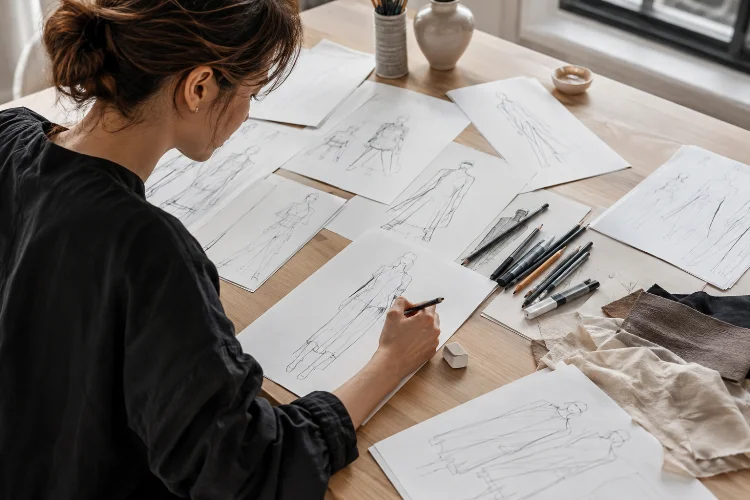
Fashion sketches do not need to look like perfect works of art. Their main job is to communicate an idea: how a garment falls, where the volume sits, what the silhouette looks like, and what kind of mood the designer wants to create.
Still, drawing confidently can feel frustrating when you are just starting. Hands look strange, poses become stiff, fabric seems flat, and that elegant coat in your imagination somehow turns into an awkward shape on paper.
The good news is that fashion drawing is a skill, and skills improve through repetition.
Learning how to improve fashion sketching skills through daily practice is less about spending five hours on one beautiful illustration and more about developing observation, coordination, proportion, and visual communication a little at a time.
Parsons, for example, teaches fashion sketching through figure observation, human proportions, movement, garment shapes, draping, textures, and line quality.
With a simple daily routine, your sketchbook can become one of your most useful design tools.
1. Start With Short Gesture Drawing Sessions
One of the biggest mistakes beginners make is trying to draw every detail immediately.
Instead, start with gesture drawing. A gesture sketch captures the basic movement, direction, and energy of the body without worrying about perfect anatomy.
Spend five to ten minutes drawing quick figures. Give yourself 30 seconds, one minute, or two minutes for each pose.
The goal is speed.
Focus on the direction of the shoulders, hips, spine, arms, and legs. If the person is leaning, walking, twisting, or sitting, try to capture that movement with a few confident lines.
Parsons’ Drawing: Form & Fashion course similarly emphasizes movement, gesture, shape, draped cloth, mark making, and proportion as fundamental drawing skills.
Fast practice also prevents perfectionism. When you know you only have one minute, you stop worrying about whether an elbow looks flawless and begin thinking about the overall pose.
Try creating five quick gestures every day. After several weeks, your figures will usually start looking more natural and less stif.
2. Practice Fashion Figure Proportions Regularly
Fashion illustration often uses an elongated figure known as a croquis.
A croquis acts as a foundation on which designers can quickly develop clothing ideas.
Fashion figures are frequently more exaggerated than realistic human anatomy because the goal is usually to emphasize garments and silhouettes rather than create a medical illustration.
Parsons’ introductory design sketching course specifically teaches students to begin with a croquis while studying human proportions and drawing from live models.
However, exaggeration works best when you first understand the basic structure of the body.
Practice drawing simple figures using the head as a measurement reference. Mark the shoulders, waist, hips, knees, and feet before adding clothing.
Do not draw detailed faces yet.
Your daily exercise could be as simple as drawing three standing figures from the front, side, and three-quarter view.
Once those become easier, introduce movement.
Draw someone placing weight on one leg. Tilt the shoulders slightly opposite the hips. Experiment with walking and seated poses.
The goal is not to create the same perfect fashion figure repeatedly. You want enough understanding of proprotions that you can modify poses confidently when a design requires it.
3. Learn to Draw Clothes Around the Body
A common beginner habit is drawing clothing as if it were painted directly onto the figure.
Real garments have volume.
A jacket sits away from the torso. Wide-leg trousers create space around the legs. A puff sleeve extends beyond the arm, while a thick wool coat changes the entire outline of the body.
This is why fashion drawing requires you to think about the relationship between body and garment.
University of the Arts London includes drawing garments, drapery, volume, gesture, movement, texture, patterns, and different fabrics among the core areas of fashion drawing practice.
Use the Silhouette First
Before drawing buttons, seams, pockets, or embroidery, establish the overall silhouette.
Sketch the body lightly. Then draw the outer shape of the garment over it.
Ask yourself where the fabric touches the body and where it moves away.
For daily practice, choose one garment category at a time. Monday might be jackets, Tuesday dresses, Wednesday trousers, Thursday skirts, and Friday coats.
Draw five variations rather than spending all your time perfecting one.
Variation develops design thinking as well as drawing ability.
4. Study How Different Fabrics Behave
A silk dress should not look like a denim jacket.
Understanding fabric behavior can make a huge difference to fashion sketches because every textile has its own weight, drape, texture, stiffness, and movement.
Lightweight chiffon might create soft, flowing folds. Leather generally produces stronger shapes and fewer delicate wrinkles. Heavy wool can hold structure, while jersey may follow the body more closely.
Adobe’s guide to fashion illustration recommends paying attention to the texture and characteristics of the fabric when representing garments visually.
Create a weekly fabric study in your sketchbook.
Pick one material and observe photographs or actual garments made from it. Look at what happens around elbows, shoulders, waists, knees, and hems.
Then make several small drawings.
Do not attempt to reproduce every wrinkle. Identify the folds that communicate the fabric most effectively.
This kind of observation teaches you why a few well-placed lines can describe material better than dozens of random marks.
Over time, your sketches will begin communicating whether a garment feels soft, structured, transparent, heavy, shiny, or flowyng without needing written explanations.
5. Separate Design Sketches From Finished Illustrations
Not every drawing deserves an hour of polishing.
Fashion students benefit from understanding the difference between design sketching and fashion illustration.
A design sketch is usually about developing and communicating an idea quickly. You might produce many sketches while testing sleeves, collars, proportions, seams, or silhouettes.
Fashion illustration can be more expressive and presentation-focused. Adobe notes that fashion illustration often emphasizes the personality and mood of the figure, while technical or design-oriented sketches perform different communication functions.
Parsons also describes fashion illustration as a discipline that allows students to build their own creative imagery and individual visual methodologies.
For daily practice, spend more time generating ideas than making everything portfolio-ready.
Try a 20-minute exercise in which you create ten variations of one dress.
Change only one element at first.
Make the sleeves wider. Move the waist. Shorten the hem. Add asymmetry. Change the neckline. Introduce a second layer.
This trains your hand and your design brain at the same time.
6. Practice Details, Color, and Texture in Small Studies
Details can make fashion drawings more believable, but you do not need a complete figure every time you want to practice them.
Create small sketchbook sections dedicated to collars, pockets, sleeves, pleats, gathers, zippers, buttons, seams, and footwear.
Draw five collar variations in ten minutes.
Then do five sleeves.
Another day, study how stripes wrap around a curved body or how a floral pattern changes across folds.
Color practice can be equally focused.
Try rendering one garment using markers, colored pencils, watercolor, or digital brushes. Pay attention to where shadows appear and where highlights help describe volume.
UAL’s fashion drawing curriculum includes shading, fabric rendering, pattern, texture, colored pencils, markers, and different illustration techniques, reinforcing the value of practicing these abilities separately rather than trying to master them all in one finished piece.
You can also work digitally. Parsons’ digital fashion illustration coursework includes drawing tablets, styluses, Photoshop, digital painting applications, and other digital presentation methods.
The medium matters less than practicing consistently.
7. Copy for Learning, Then Design From Memory
Studying other drawings can help you understand technique.
Choose fashion illustrations you admire and analyze how the artist uses line weight, pose, negative space, color, texture, and exaggeration.
You can reproduce selected works privately as an educational exercise, but do not present copied artwork as original portfolio work.
Then close the reference.
Try creating a completely different garment using one technique you learned.
For example, perhaps an illustrator uses loose watercolor to communicate transparent fabric beautifully. Instead of reproducing their exact dress, apply a similar rendering principle to your own jacket or skirt concept.
UAL encourages students to explore different approaches, media, techniques, and illustrators while gradually developing their own visual language.
Your personal style usually develops through experimentation rather than through deliberately trying to invent something nobody has ever seen.
Practice first. Your visual identity will become clearer with time.
8. Build a Daily Routine You Can Actually Maintain
Consistency beats an ambitious routine that you abandon after four days.
You do not need to sketch for hours.
A practical 30-minute session could include five minutes of gestures, ten minutes of fashion figures, ten minutes of garment variations, and five minutes of fabric or detail studies.
On busy days, draw for ten minutes instead.
The important part is keeping your hand and observation skills active.
Parsons’ Fashion Design Basic Core expects regular assignments and ongoing visual source-book development, reflecting the importance of repeated practice throughout the design process.
Keep your old drawings instead of throwing them away.
At the end of every month, compare your newest sketches with work from four weeks earlier. Look specifically at posture, proportions, confidence of line, garment volume, fabric representation, and design variety.
You may notice progress that was difficult to see from one day to the next.
Also identify one weakness for the following month.
Maybe your figures are improving but shoes remain awkward. Perhaps your garment detials are strong but every pose looks identical.
Focused correction prevents daily practice from becoming mindless repetition.
Learning how to improve fashion sketching skills through daily practice is not about producing a masterpiece every time you open your sketchbook.
Progress comes from repeatedly practicing the smaller abilities behind successful fashion drawing: observation, gesture, proportion, silhouette, garment volume, fabric behavior, details, and visual communication.
Keep your routine simple enough that you can maintain it. Draw quick figures, experiment with different garments, study real fabrics, test new materials, and review your older work regularly.
Most importantly, allow yourself to make imperfect drawings. A sketchbook should be a place for exploration rather than constant performance.
Open a fresh page today and spend just 20 minutes drawing. Do the same tomorrow. Over a few months, those small sessions can build noticeably stronger, faster, and more confident fashion sketching skills.