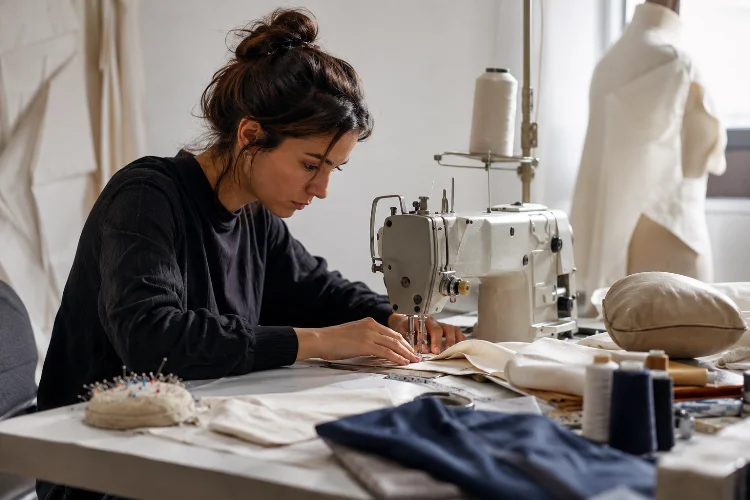
A great fashion sketch can communicate an exciting idea, but eventually that idea has to survive contact with fabric, thread, seams, and a sewing machine.
That is why sewing remains one of the most valuable technical skills for fashion students. You do not necessarily need to become a professional sample machinist, but understanding how garments are constructed makes you a better designer.
It helps you create realistic sketches, communicate with pattern makers, solve fitting problems, and understand why certain design details are easy-or expensive-to manufacture.
The essential sewing techniques every fashion student should master go far beyond simply knowing how to stitch two pieces of fabric together.
Professional garment construction involves accurate cutting, seam selection, hems, darts, pressing, closures, finishing, and careful fabric handling.
Parsons includes sewing alongside pattern making, draping, and garment construction as a core technical foundation of fashion education.
The best way to improve is simple: practice these techniques repeatedly on small samples before attempting complicated garments.
1. Master Sewing Machine Control First
Before making jackets, trousers, or dresses, become comfortable controlling a sewing machine.
You should be able to sew a straight line without constantly watching the needle. Instead, learn to guide the fabric using the seam guide on the machine.
Practice starting and stopping cleanly, backstitching, turning corners, following curved seams, and maintaining consistent seam allowances.
University of the Arts London introduces aspiring designers to both industrial sewing machines and overlockers while combining machine practice with cutting and garment construction.
Speed is less important than control.
Professional-looking sewing usually comes from accurate, consistent stitching rather than pushing the machine as fast as possible.
A useful daily exercise is to draw straight, curved, and spiral lines on scrap fabric and sew directly along them without thread at first. Once your machine control improves, repeat the exercise with thread.
This builds coordination without wasting valuable fabric.
2. Learn the Main Seam Types and When to Use Them
Seams are the foundation of garment construction.
A seam joins two or more pieces of material using stitches. Coats Group classifies garment seams into categories including plain, lapped, bound, and flat constructions, with different applications depending on the garment and material.
The plain seam is one of the most common techniques and should become second nature.
You should also practise French seams, flat-felled seams, bound seams, and enclosed seams.
A French seam hides raw edges inside the construction, making it useful for lightweight or semi-transparent fabrics such as chiffon or fine cotton.
Flat-felled seams create a stronger, flatter finish. They are commonly associated with shirts, jeans, workwear, and garments that require durability.
Do not choose a seam because it looks impressive.
Choose it because it suits the fabric, garment type, desired appearance, and expected stress.
The inside of a garment matters almost as much as the outside. Clean stiching immediately makes student work look more professional.
3. Practice Seam Finishing and Clean Raw Edges
Fabric edges can fray, unravel, or become bulky if they are not finished correctly.
That is why students should learn several seam-finishing methods.
Overlocking is common in ready-to-wear production because it trims and encloses raw edges efficiently.
Parsons’ Specialty Sewing Lab includes overlock, serger, coverstitch, zigzag, and straight-stitch machines, reflecting the variety of equipment used for different garment-finishing needs.
Other options include zigzag finishing, binding, pinking, turning and stitching, or enclosing the raw edge within another seam.
The best finish depends partly on the textile.
A thick wool seam may become unnecessarily bulky if treated the same way as lightweight cotton. A transparent fabric may require a clean enclosed finish because the inside of the garment can remain visible from the outside.
Create a sample book containing different seam finishes.
Label each sample with the fabric type, seam method, stitch length, and anything you learned while sewing it.
That reference book can become surprisingly useful later.
4. Understand Darts, Pleats, Gathers, and Shaping
Flat fabric needs shaping to follow the human body.
Darts are one of the most fundamental methods.
A dart removes excess fabric and helps shape garments around areas such as the bust, waist, shoulders, or hips.
When sewing darts, accurate marking is essential. Both legs of the dart must meet correctly, and stitching should gradually taper toward the point rather than ending abruptly.
UAL includes dart positioning and pattern-to-fabric transfer among practical sewing and couture skills.
Pleats and gathers create volume instead of removing it.
Pleats produce controlled folds, while gathering distributes fullness through smaller fabric folds created by stitching and drawing up the thread.
These techniques may look simple, but uneven distribution can quickly make a garment appear amateur.
Practise creating different amounts of fullness.
Compare what happens when 60 cm of fabric is gathered into 30 cm versus 20 cm. Understanding these relationships will help you design more intentionally.
5. Learn How to Sew Professional Hems
A hem finishes the lower edge of a garment or sleeve.
Different garments require different hemming techniques.
A simple turned hem works well for many cotton skirts and trousers. Lightweight dresses may require narrow rolled hems, while tailored garments can use blind hems so the stitching is barely visible from the outside.
UAL’s beginner sewing courses include several seam and hem finishes as core technical skills. FIT’s couture training also includes professional seam and hem finishing alongside hand stitching, pressing, and garment construction.
Fabric behavior matters here too.
A thick fabric may require reducing bulk before folding. Curved hems sometimes need easing because the outer edge contains more fabric than the area where it is being folded.
Always press a hem before final sewing.
Rushing directly from cutting to stitching often produces uneven edges.
Clean finshing is one of the easiest ways to make a simple garment look more expensive.
6. Become Comfortable With Zippers and Closures
Closures are often intimidating for beginners because small alignment errors can become extremely visible.
Start with standard centered and lapped zippers before moving to invisible zippers.
An invisible zipper should sit neatly inside the seam so that the zipper teeth are largely hidden when the garment is closed. Coats provides specific technical guidance because zipper performance depends heavily on correct positioning and stitching.
Do not sew a zipper into your final garment the first time you attempt the technique.
Make samples.
Practise positioning the zipper, changing to the correct presser foot, sewing close to the teeth, and matching waistlines or horizontal seams across both sides.
You should also understand buttons, buttonholes, hooks and eyes, snaps, and other fastening methods.
UAL’s couture-focused hand-sewing training includes several types of buttons, fastenings, and hand-worked buttonholes.
Closures are functional details, but they also affect the appearance and usability of the garment.
7. Never Underestimate Pressing
One of the biggest differences between beginner sewing and professional garment construction is often pressing.
Pressing is not the same as casually ironing clothes after they are finished.
Garments should be pressed throughout construction.
Press a seam after sewing it. Press darts in the correct direction. Press hems before stitching them. Shape curves carefully with steam where appropriate.
UAL includes pressing and finishing as part of practical pattern-cutting and sewing training, while FIT’s couture courses place pressing alongside cutting, seams, hems, and finishing as a professional construction skill.
Pressing helps seams lie flat and gives garments cleaner structure.
However, temperature matters.
High heat that works perfectly on cotton could damage delicate synthetics. Always test a scrap of fabric first.
Use pressing cloths when necessary, and avoid aggressively sliding the iron across areas that could stretch or distort.
Good presssing can transform average sewing into something considerably more polished.
8. Develop Basic Hand-Sewing Skills
Even in modern fashion studios filled with industrial equipment, hand sewing remains useful.
Machines are fast, but some jobs require greater control.
Fashion students should practise running stitch, basting, backstitch, slip stitch, overcast stitch, and basic button sewing.
Basting is especially useful.
Temporary stitches can hold difficult areas together before permanent machine sewing, making them valuable for tailoring, matching patterns, setting sleeves, or testing placement.
UAL’s couture and bespoke sewing course teaches a wide range of hand techniques, including basting, backstitching, slip stitching, herringbone stitches, buttonholes, tailor’s loops, and thread marking.
Hand sewing is also useful for invisible finishing.
Linings, hems, hooks, trims, and delicate details may look cleaner when attached manually.
You do not need couture-level speed.
Focus on making stitches small, consistent, secure, and appropriate for the task.
9. Learn to Handle Different Fabrics Correctly
Sewing cotton is not the same as sewing chiffon, stretch jersey, denim, leather, or satin.
Every material creates different technical challenges.
Slippery fabrics can shift during cutting and sewing. Stretch materials may require specialized stitches, needles, or machines. Heavy denim can create bulky seam intersections, while delicate textiles can develop visible needle holes.
This is why UAL connects sewing education with choosing suitable fabrics, pattern layout, cutting, and construction rather than treating machine sewing as an isolated skill.
Learn to change your needle according to the material.
Also experiment with stitch length, thread, presser feet, seam finishes, and machine tension.
Never test unfamiliar settings directly on the garment.
Use scraps from the same fabric.
That small habit can prevent damaged seams, skipped stitches, puckering, and hours of frustrating unpicking.
Strong garment contruction comes from understanding the material as much as understanding the machine.
The essential sewing techniques every fashion student should master include much more than basic machine stitching.
Strong garment construction depends on accurate seams, clean finishes, darts, hems, closures, pressing, hand sewing, and the ability to adjust techniques for different fabrics.
You do not have to master everything at once.
Start by creating a technical sewing sample book. Practise one seam, hem, closure, or shaping technique at a time, label each example, and keep your mistakes alongside the successful versions.
That process builds both skill and confidence.
The more you understand how garments are physically constructed, the more realistic and creative your design decisions can become. Pick one technique this week, make five samples, and aim for visible improvement rather than immediate perfection.